MEDISOFT: REBUILD PATIENT VOLUME - QUICKLY FIND CANCELLED APPOINTMENTS
Due to the COVID-19 pandemic many medical providers closed their offices to patients or saw a drastic reduction in patient visits. As practices look to opening to patients again there is likely a backlog of canceled appointments which you may want to reschedule for the future. This document demonstrates how to use Medisoft’s appointment schedule and a custom report to assist in contacting patients who need to reschedule.
BACKGROUND
Medisoft’s schedule, Office Hours Professional, offers an Appointment Status indicator for each appointment. All appointments start with an “Unconfirmed” Status. If the practice contacts patients to confirm their appointment, the Status can be changed to “Confirmed”. Other Status options include; Checked In, Missed, Cancelled, Being Seen, Checked Out and Rescheduled. Although it is not required to use the Appointment Status, it is strongly encouraged for accurate reporting and historical accuracy.
Be aware if a patient cancelled their appointment (or the practice cancelled the appointment), and you set the Status to “Cancelled”, the appointment is removed from the appointment grid and is not visible. However, you can still see the cancelled appointment in reports. You can either right-click on the appointment in the schedule, then select the appropriate Status or Edit the appointment and check the correct Status radio button.
Attached is a custom report to assist in your efforts: (Custom Appointment List with Status.rtm) and step by step instructions on how to install the report.
For the custom report to properly include the patient appointments and their current Status--so you know which appointments need to be rescheduled--you must include a Case in the original appointment. The report also includes the date last seen so patients with multiple cases will show on the report with the corresponding case. These are not duplication's.
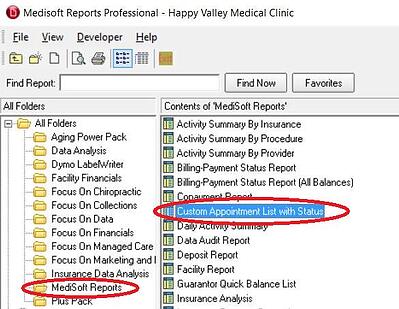
Import and place the custom report into a report folder for your practice then locate it from the report list. The screen shot, below, shows the report in the Medisoft Reports folder with the report name of “Custom Appointment List with Status”.
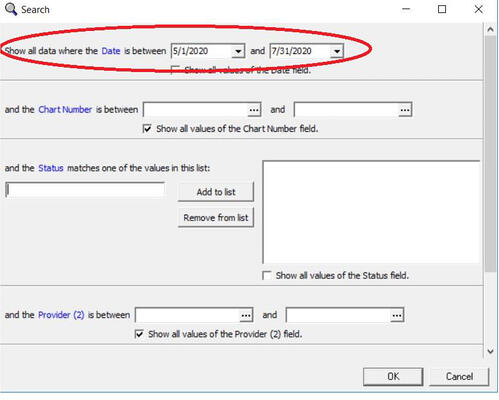
Enter a date range of appointments and be sure to go back far enough to catch when your office began cancelling appointments (likely mid-March) and extend the date range out far enough to include any appointments which may have already been scheduled in the future. Then run the report.
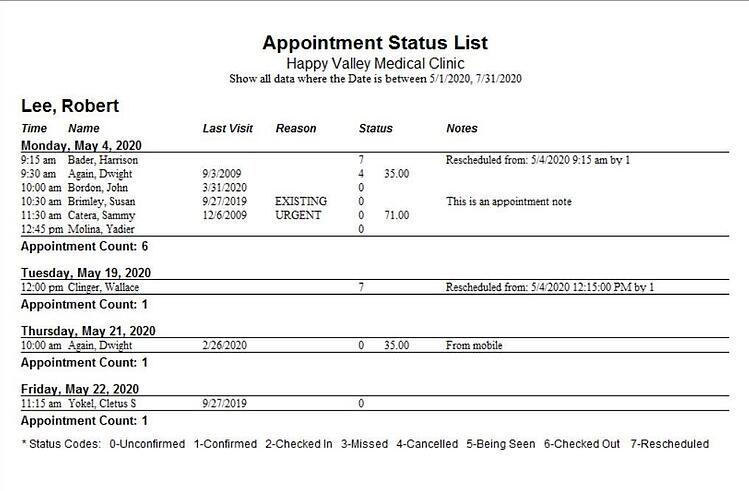
Take note of the numeric Status Codes in the report which will indicate if the appointment was Cancelled or the status was never changed while the office was closed. Those are the appointments you will wish to reschedule by contacting the patient. The report also shows which appointments have already been rescheduled.
In additional the report shows the following additional information:
Date of Appointment
Rescheduled Date
Scheduler User
Last Visit Date according to Case
TO RESCHEDULE APPOINTMENTS
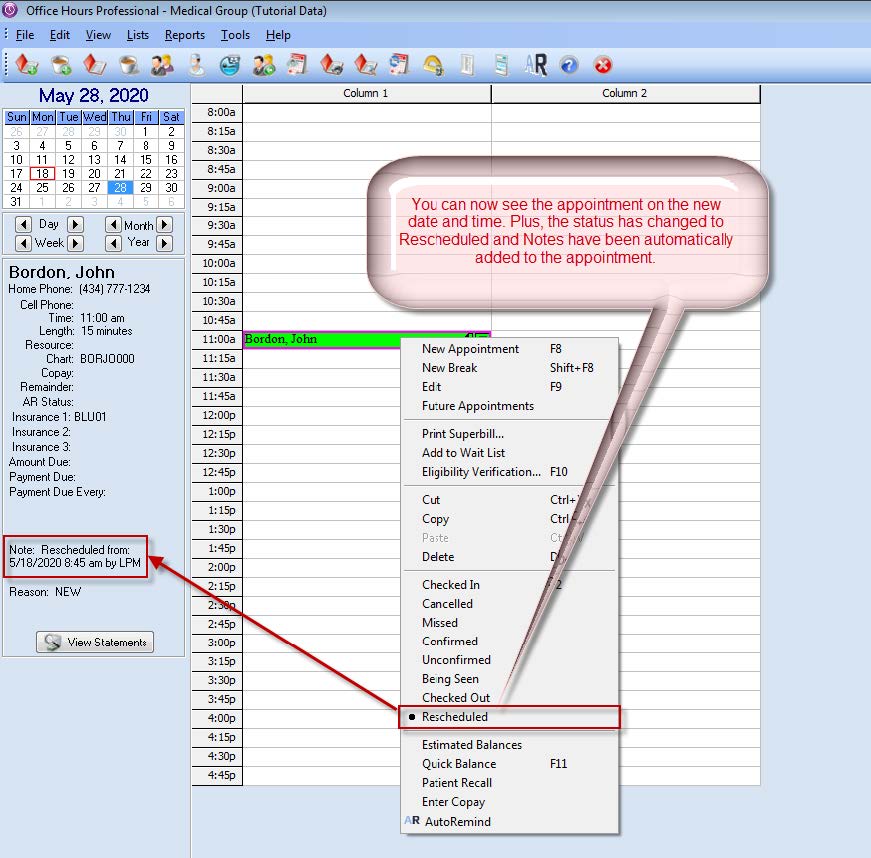
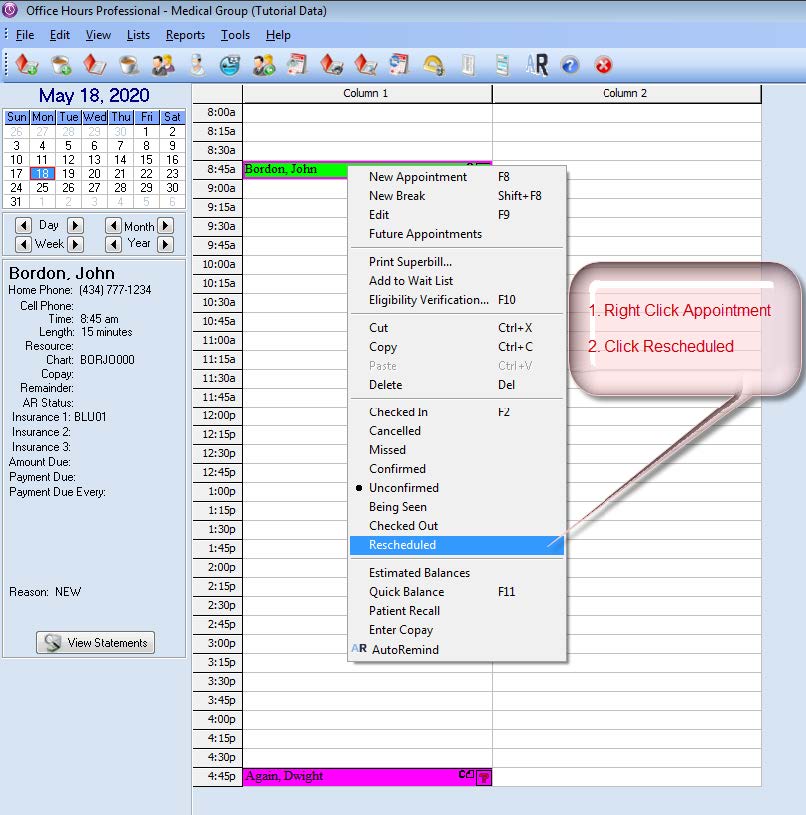
Now that you know which appointments need to be rescheduled you can easily do so with a right-click on the desired appointment. Then choose “Rescheduled” from the Status list.
The selected appointment is now removed from the original date and time slot and is placed in the Wait List so it can be rescheduled.
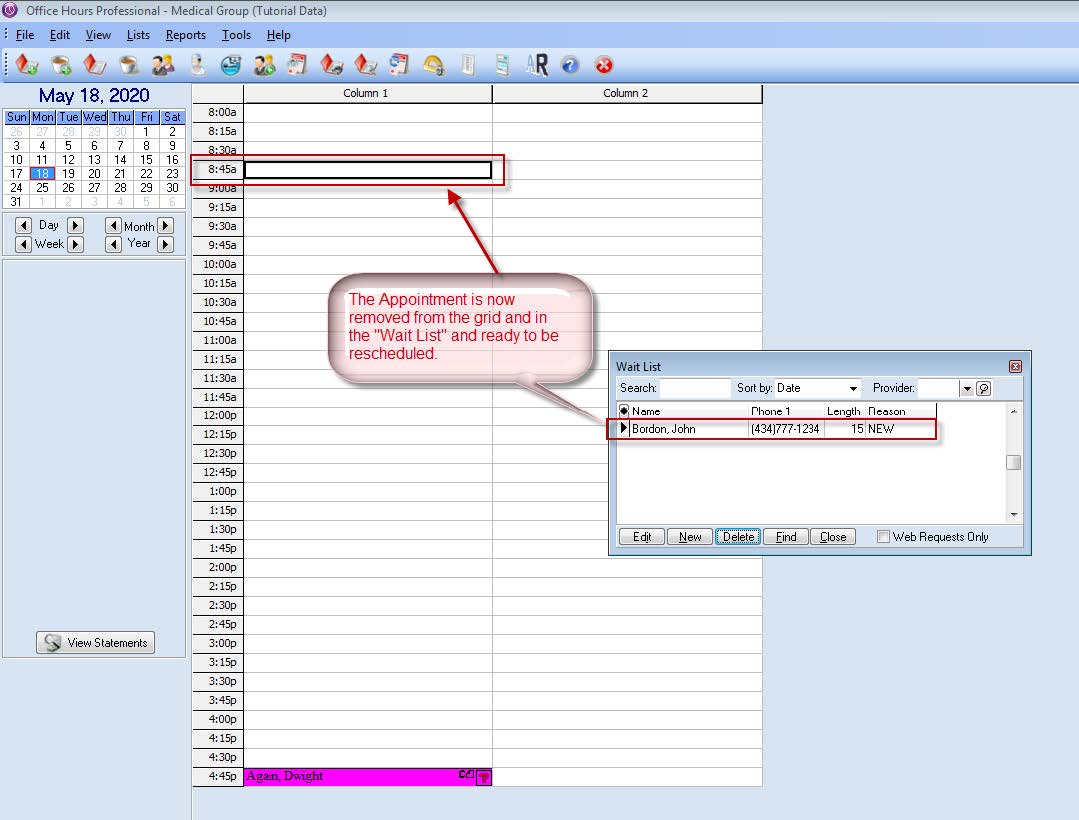
At this point there are two methods you can use to locate an opening in the calendar. You can press “Find” at the bottom of the Wait List window to search and locate open appointment times, based on search criteria you provide and then set the rescheduled appointment.
Otherwise, manually locate an available date and time for the rescheduled appointment to be placed. This is the method detailed in this guide.
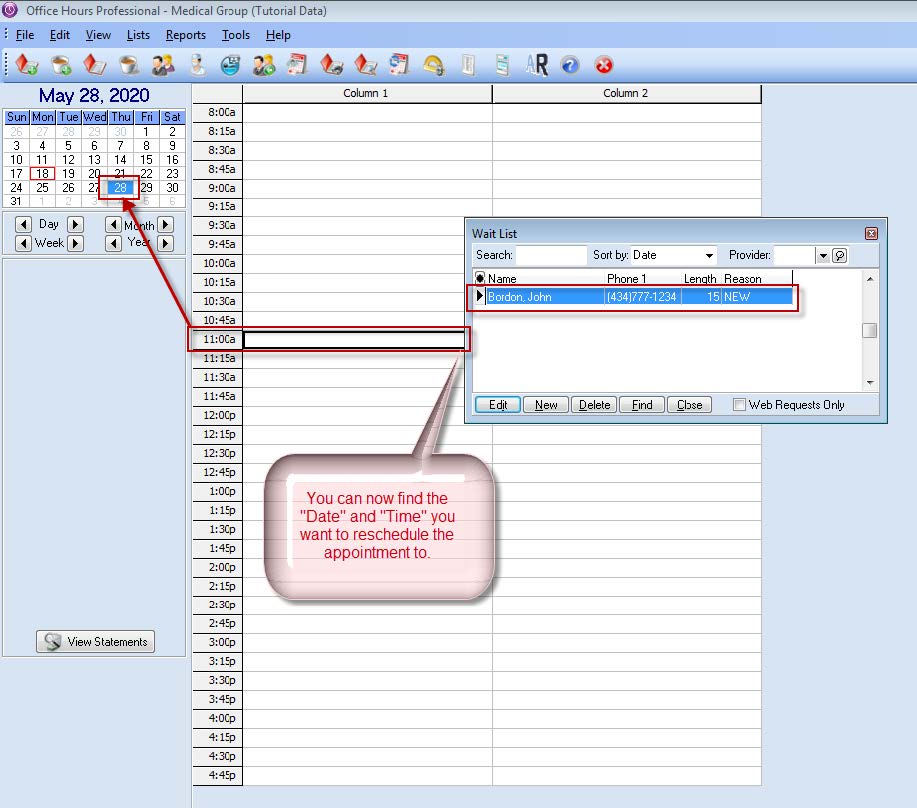
Click the appointment from the Wait List and drag it to the new date and time slot. Then close the Wait List.
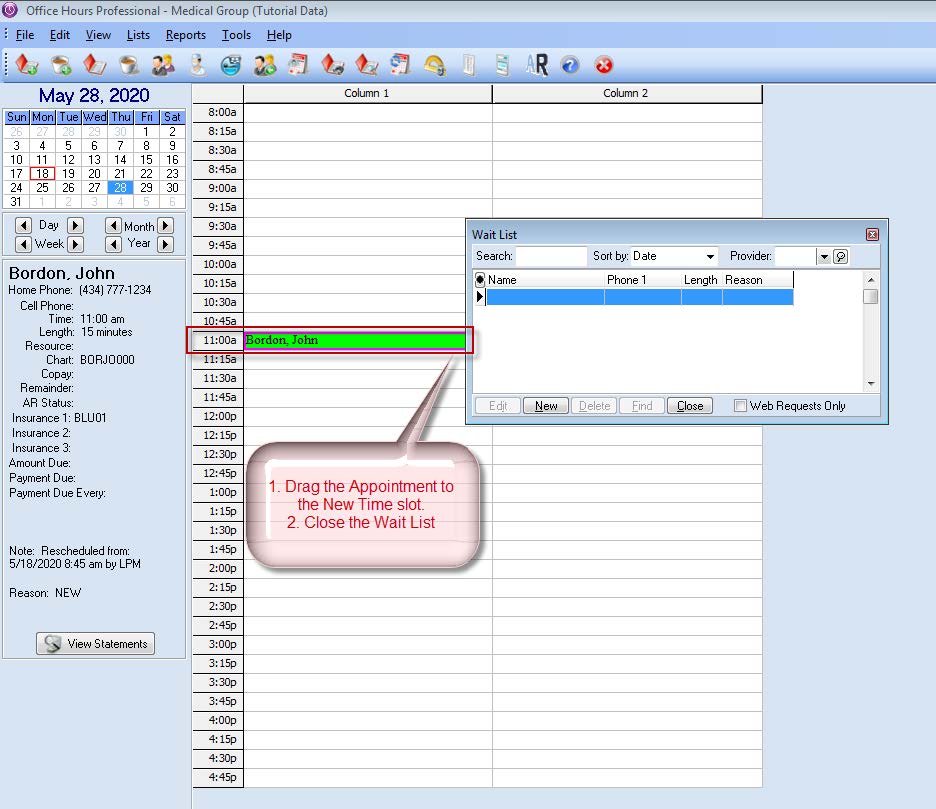
The rescheduled appointment now shows in the new date and time in the calendar grid, it’s Status is shown as “Rescheduled”, and a Note has been added to the appointment which indicates the date and time of the original appointment, before it was rescheduled.
